Tuesday, February 06, 2007

AAR: Stonne 4 - Trial by Strength

Nick Drinkwater

German, [ELR3, SAN 2]: Nick Drinkwater

French, [ELR3, SAN 4]: Tom ("I roll 4s") Gillis

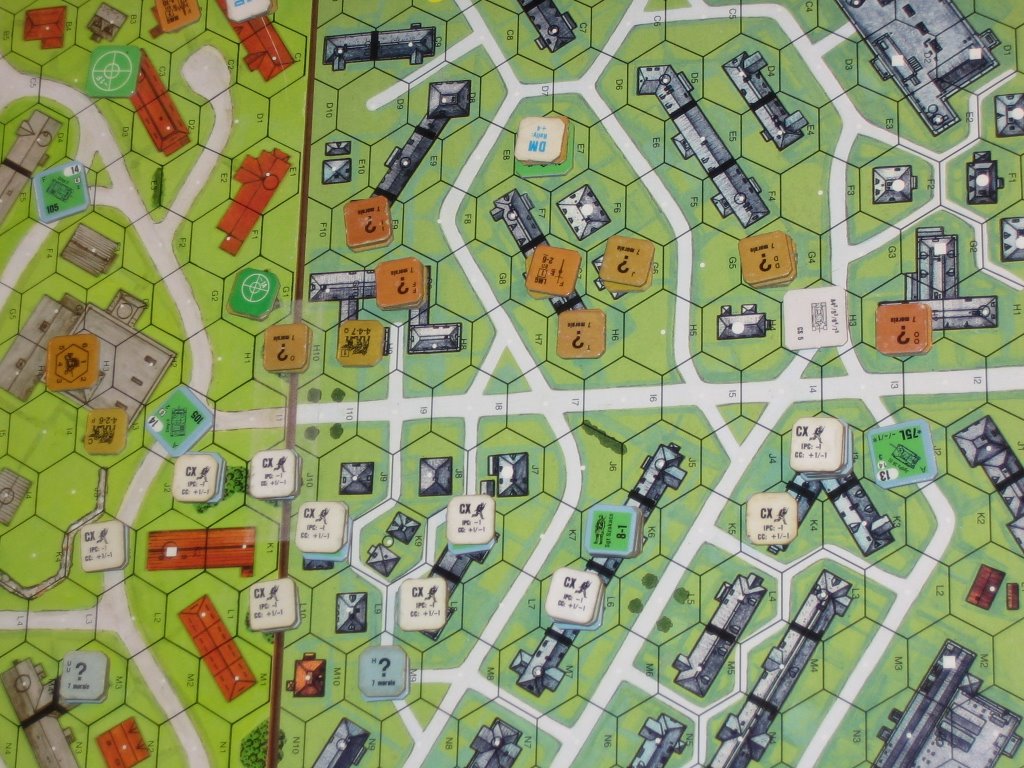
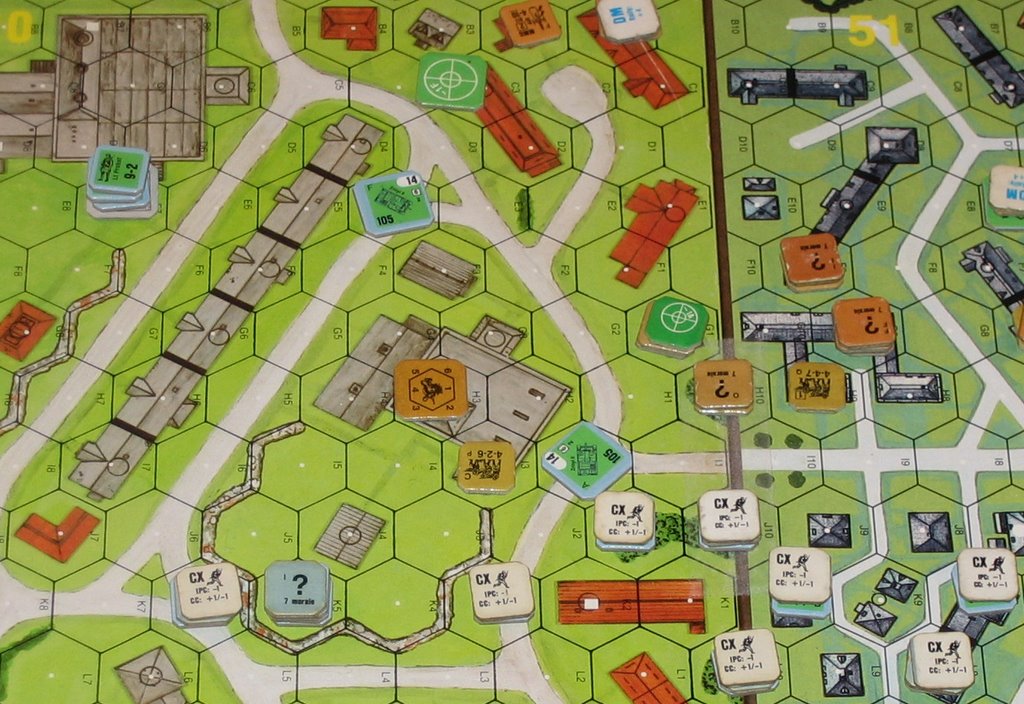
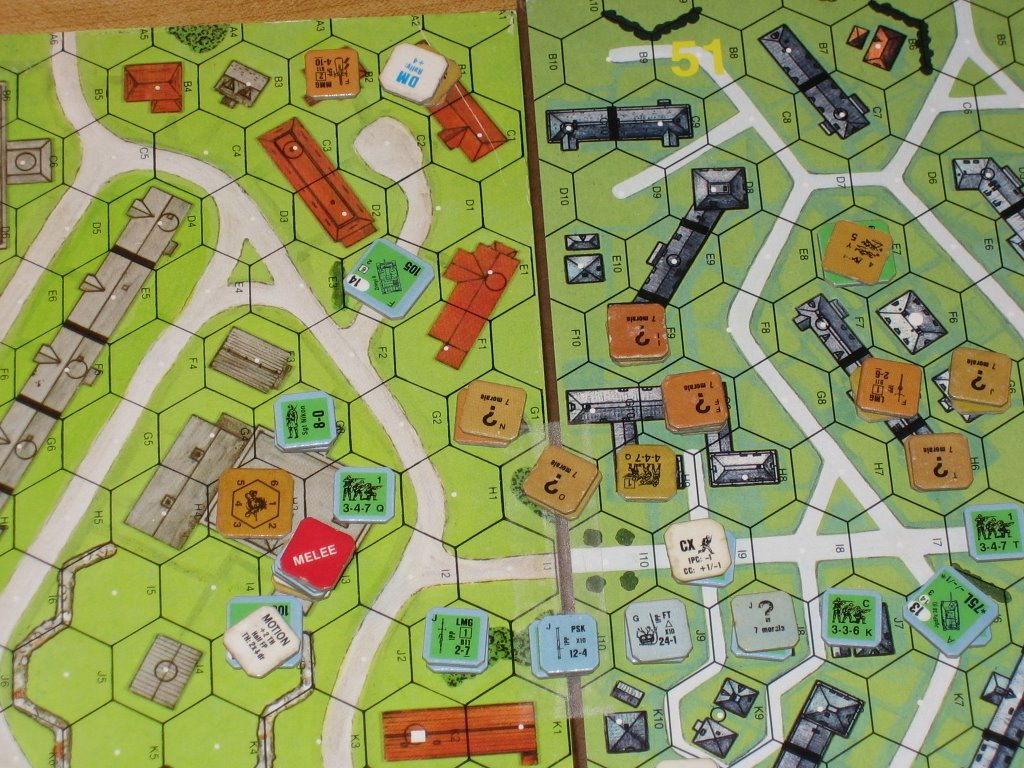
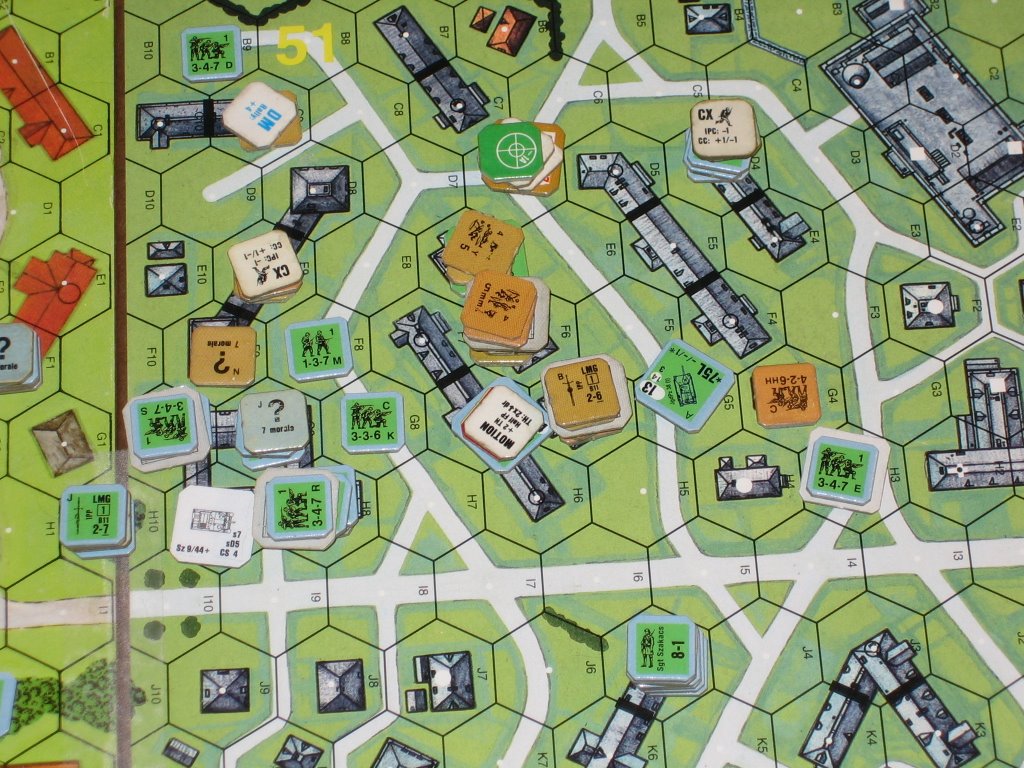
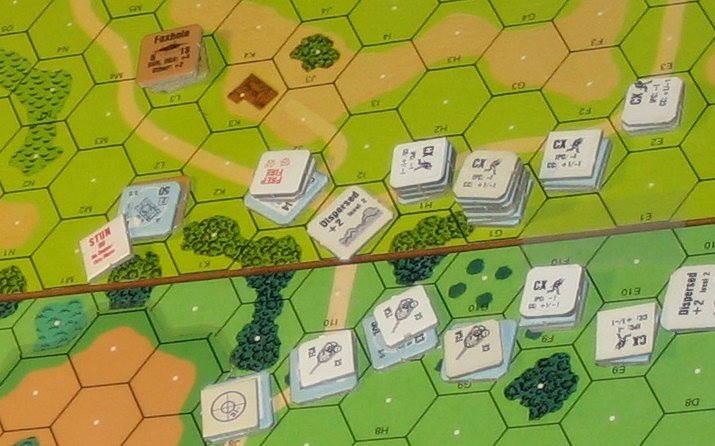
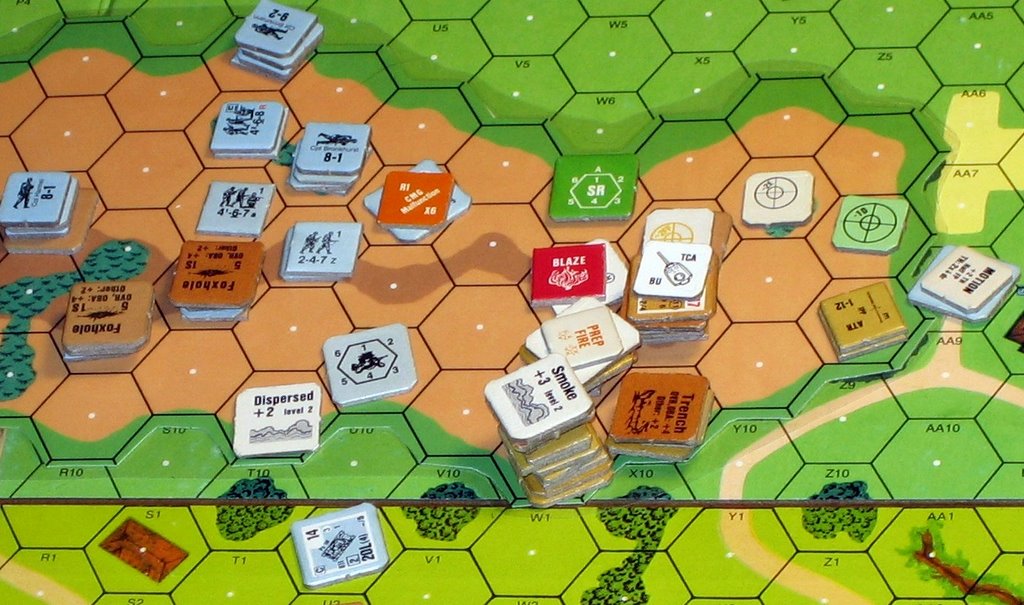
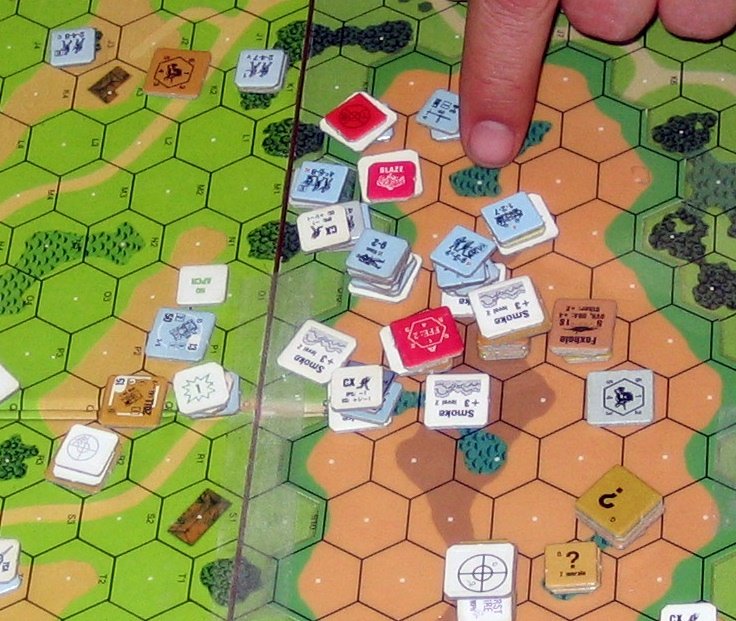
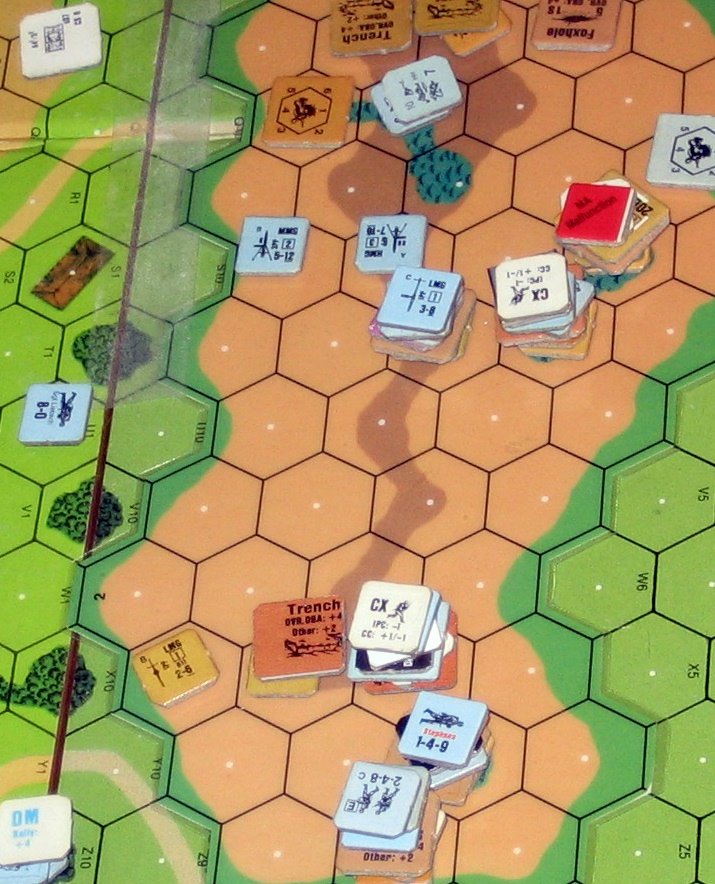
A full free day for gaming, so we wanted to try a monster game to play. This one is eight action-packed turns of early war mayhem on the excellent Stonne map, which is fabulous - one of Critical Hit's earlier efforts that probably is a bit underplayed. There are some gems among their early modules and I think this one looks particularly good - probably one of the best, alongside "Ruweisat Ridge" and "Those Rugged Bloody Heroes" and produced before CH got lost in the game-playing dead-ends of serious counter variantism (such as Pointe de Hoc) or really ugly maps (Carnage at Cassino). The whole map area is in play but the main focus of the scenario is centered on the plateau and village of Stonne itself. Stonne village is a mix of small ground-level stone cottages with some narrow- street terrain and rowhouses, but the village nestles snugly above a very steep wooded escarpment with numerous double-crest hexes to really put a crimp in all attempts by the Germans to swiftly reinforce the melee.

Access to the village from the south is by a long straight road, parallel to the base of the escarpment that, through a nasty hairpin, enters the main plateau playing area by the notorious sunken road "bottle neck". This is the only way the German armour can get in to the village at all as we could find no errata that would allow me to create vehicular trailbreaks through the rear escarpment-hugging woods anywhere. I understand that in the Campaign Game the French can boresight, block, mine and generally make this outlet hex impossible for the Germans to move through which seriously hampers them and makes it much more difficult / close to impossible for the Germans to win - I'm not sure if CH have amended this or not, but allowing Trail Breaks would certainly provide a much bigger degree of tactical flexibility for the Germans.

Of the 27 buildings onboard, the winner has to control the majority at Game End - three of these stone huts are isolated to the north and are effectively "gimmes" for the French who can set up in / adjacent to them. Four more buildings are just connected to the main Stonne village, but are on a small Level 7 plateau with the 1-hex water tower, which acts like a factory - the village itself is just to the southwest on Level 6, and has a small church with steeple, but this struggles to see over the many in-season orchards. Despite the apparent plethora of open ground on the approaches to the village, ground assaults will actually be more covered than is first discernable. One good thing to assist the defense are the numerous barbed wire fences that cross everywhere - these are difficult to traverse with infantry and require all tanks to make a simple non- modified bog check (bog on a 12). These should impact the assault.

Overall, the scenario represents the first big French counter-attack after the Germans have just taken the town for the first time (it is probably equivalent to the classic old SL scenario, "Counterstroke at Stonne"!). Though attacking, the French setup first with 6 x 457, 9-1, HMG and MMG plus foxholes adjacent to the three 'gimme' houses and also separately next to the water tower - they are starting to ready themselves for the impending MASSIVE assault by a mixed French armour and infantry force from the east: the attacking force consists of 15 (FIFTEEN!!) tanks - six of the behemoth Char B1-bis, six H39(L)s and three FCM 36s. These all have good to awesome armour for this time of the war, and though they are all 1MT and need to operate with (french) modified platoon movement, they are good gun platforms, and the B1-bis are really nasty with 3 potential attacks per fire phase. In addition, to represent early war tank fright, any infantry that moves or is moved adjacent to a tank has to take a PTC - more pain for the outnumber germans! To escort this tank company is a massive Turn 2 infantry attack force of 23 x 457s, 9-2, 9-1, 2 x 8-1, 7-0, and a plethora of machine guns. Ouch. Count em folks - thats 29 squads in total - not often we get to play with that many troops.

The Germans are going to have a tough job holding on until their reinforcements arrive. On board they start with 6 x 468 and a 9-1 in the water tower hamlet and 12 x 467s, 1 x HMG, 1 x MMG and 4 x LMG in the village proper together with a 9-2, 8-1, 8-0 and 3 x ATR. This is all stiffened by three 37L AT Guns in the water tower hamlet, and three more in the main village, together with two 75mm Inf Gun and two recently captured French pop guns (25LL). An apparently powerful blocking force, but against the B1-bis, it is going to be Deliberate Immobilizations only for all of these guns, and only moderate to low chances to kill the other French arnmour (TK numbers of 9 versus Armour of 4 / 6). Also important is that MGs are only going to DI the FCM 36s, and the ATRs are only going to DI the H39s and FMR35 - the Char B1s were effectively imvulnerable to all these LATW. Not good for the Germans, not good at all.

To respond to this massive thrust, the Germans get to dash on a MG company with 8 x 468 squads, four MMG and a 9-1 leader which enters on the south side on Turn 1. To try and counter all that French armour,the Germans also need to rush on six early war Stugs via the sunken road bottle neck, starting on Turn 3. Note that the earliest that any impact will be felt by these Stugs is Turn 5 as it will be at least two turns to get the Stugs up that long slow climb and into the fighting proper. Finally, on Turn 4, the Germans get a 7-0, a Kubelwagen and a Radio for 150mm OBA with scarce ammo. Again, getting it into any position to be able to affect the outcome of the game is unlikely to happen until Turn 6 at the earliest as driving in to the village will take 2 Turns (assuming no interference from the French). The alternative of dismounting and then hiking in will probably take longer as those are steep wooded slopes which that leader has to climb - as my MG platoon was about to find out the hard way.

Early blows were traded with Tom's initial assault on the water tower hamlet being rebuffed and me even managing to Immobilize a Char 1 in a position where it was unable to fire on any of the village. I shrugged off a couple of early MCs and sent the first few French squads packing, but attrition started to bite as four of my 468s and two of the three Gun crews got waxed in CC for a net return of one and a half squads - as was remarked at the time, my CC luck (or lack thereof) is legendary amongst our local crew and I continued my usual trend by missing a bunch of ambushes or attacks vs withdrawing broken units by 1 or more. Recognizing the threat from the Chars, I jumped into CC with one with a 468 and a 9-1 instead of reinforcing a melee - this leviathan was stopped and should have been toast, but I then rolled a 12 to CR myself from Crew small arms!! A long-odds in-hex shot from Tom then broke the survivors and that one hurt a lot too. To follow the loss of both these strong points, Tom, with an Improbable Critical Hit from a 47mm Char Turret Gun, took out the third of my outlying 37L AT Guns - the three outlying AT Guns scored a total of 1 Immobilized Char B1- bis from six or seven hit attempts - not a viable exchange rate.

Tom sent a big right hook HMG platoon around to the west to reinforce two of the at-start HIP squads in the outlier hamlet - my only quality sniper attack of the day took the 9-1 through the heart and this discouraged the others from doing a lot. Despite this setback, Tom sent a platoon of surprisingly nippy tank platoon to test the western defenses - I of course missed all the shots including several CCs vs bypassing tanks, and got hurt by tank MG CC attacks in return - it was ugly.

In Turn 3, I did manage to DI two of the FCMs by HMG and ATR fire, and in my only good anti-attack of the day I gained a crit on an H39 which knocked it out. I also managed to snag another bypassing H39 on the third CC attempt and I also DIed a second Char from a 75 Inf gun which had failed to find its HEAT on the first try (of course). By this point it was too little, too late, as my central town defenders went down in a never ending whirlwhind of Char B1 and H39 shots and they just melted away under relentless acquisition and an eternal run of 4s by Tom (if my SAN had been four, Tom would have lost this game). By this time, I was losing 1-2 squads a fire phase and despite continuing to attrite his troops, including a great long sharp LOS kill of a hero with a squad and a half from my HMG, it was never enough.

While Tom continued to envelop the eastern side of the defense in masses of troops and very large tanks, he also sent a flanking platoon to the south and east to try and interdict the entry areas of all my reinforcements. To get my Observer on to a viable vantage point in his small van as fast as possible, I had to nullify this threat quickly which meant leaving a Stug to deal with the problem...this he did, but this meant he was going to be at least one if not two turns late getting into the battle area behind his comrades. My MG company legged it on as fast as possible but with barbed wire fences and wooded double-crest slopes, they still weren't all even at the southern village edge by the end of Turn 4. Similarly, my first Stug was yet to appear out of the road by the end of Turn 4 due to the slow rate of climb - it is a tough row that the Germans have to hoe in this one.

The end came surprisingly fast - a two-squad detachment went down to a 8+1 shot from Tom's 9-2 and then forced to surrender and that was the last real resistance - I fired back with my 9-2 and HMG stack, but Tom passed the subsequent three 2 MC and the subsequent three (rate) NMCs with a single pin only. In the next turn, his 9-2 guys scored a 1MC on my killer stack in return and I rolled 10, 10 and 10. No point in going on from there and I conceded. When the 9-2 stack collapsed at the end, I had only 1.5 unbroken squads of my original 18 squads left, the majority being prisoner, and four of the six 37L AT Guns were crewless or destroyed. The two captured 25LL Guns were still hidden as was one of the two 75* Inf Guns, but these were not going to materially change anything. Tom still had four now invulnerable Char1s left as well as one FCM and four of the H39s...my now broken 9-2 was about to do surrender from FTR, and all my other at-start leaders were dead.

Even though the MG company and Stugs were close, they were still at least one more turn from being in the village in any force as they continued to struggle up the steep wooded slopes. Even once up, I was only then going to be holding five of the twenty seven buildings at that point - these eight squads were never going to be enough to recapture another nine buildings in only three turns, from a French force that still had nineteen of its original twenty-nine squads left. Also, it was difficult to see how my Observer was going to find a safe place to sit and observe, let alone have enough time to actual bring in a Fire Mission, espcially with scarce ammo, as he was still struggling to even get on to the board. It was going to be Turn 6 or later until at least three of the Stugs were going to get to the village as they still had to negotiate a double crest as well as the hairpin and that was just going to eat up movement points.

Despite the mauling and the dicing Tom admitted he gave me, this was actually fun - in such a huge scenario, the odd dice normally even out, but I did take the worst of it. We had two French heroes, Crew Small Arms, Berserk, a German heroic leader(and then quick death) and one Improbable Critical and one Normal Hit (both French). I had my MMG and a Lt Mtr malfunction whilst Tom had only two CMG malfunction and he did not bog a single tank at all (and there was a LOT of barbed wire fences for him to cross) - his ability to roll 4s was amazing. I really shouldn't bother with Ambush or CC in any game of ASL - it just hands VP to my opponent in nicely wrapped-up parcels labelled "To X, Free VP courtesy of my CC dice, Best regards, Nick". In this one, I killed precisely one tank in Bypass and killed 1.5 squads over at least ten CC attempts - pathetic. My AT Guns could barely dent the French Armour and I just couldn't stop the French horde in any way shape or form. To counter his numerous 4s, Tom also rolled a lot of 11s - sadly, he wasn't playing the Italians or Allied Minors so this didn't really impact him! Despite my whining, Tom played this one really well and relentlessly everything in his path, and when the opportunities came as my infantry melted away, he poured through the breach. Well played Tom!

We both thought this one favoured the French just too much - they can rapidly and easily overwhelm the initial German forces which are partially spread out and can't quickly disengage and retreat due to the at-start HIP force. The French have numerous tubes, especially the Char B1s which are essentially almost invulnerable to everything the German's have. The worst issue for the Germans though is the timing of the reinforcements - with the current schedule, it is an absolute bugger for them to get anything forceful up into the village before Turn 5 and by then the French will most likely have overrun most of the at-start village force and from then they will be very difficult to eject. To remedy this, I would suggest that the German armour come on one turn earlier and the Observer be allowed on in Turn 1 and not Turn 4 - with the scarce ammo, he's going to struggle to get more than one or two FFEs down during the game anyway, so why handicap him further with the unobtainable schedule he currently has?

Good luck to all of you at Owlcon next week - to paraphrase English soccer striker Gary Linker, "ASL is a game where a bunch of blokes roll lots of dice for three days, and then Zeb wins?!!!"

Texas ASL - February 3rd, 2007 AAR

Zeb Doyle

So, the February 2007 game day has come and gone and much ASL action was had by all. The turnout was decent with nine of us there, and we even had John Hyler and Manabu Matsuura. Manubu is new to Texas and ASL, but in just his third ASL game ever, he gave Mike Seningen quite a battle. John meanwhile played Rick in a game of Pocket Panzers, which, from the way they were shouting, sounded like it was lots of fun. The most noise came from my immediate right, however, where Mike Denson and Shostak were playing The Bozsoki Relay and engaged in what, verbally at least, must have been one of the most intense ASL games ever played.

I had the privilege of rolling dice with Brian Roundhill, who deserves a vote of thanks for hosting. We played Taking A Stand At Rosario, a really cool-looking scenario that's been on my play list forever. It's an early war fight between the Japanese and Americans in Luzon, and has all kinds of fun goodies like bicycle riding Nipponese warriors facing off against 6-6-7s on horseback. I was the defending Americans and spent a fair amount of time arranging my defense. Brian didn't have the time to look at the scenario nearly as much but still put together an excellent attack. The set-up gave me a bit of an edge, but the key to the game was the six Japanese mortars producing a grand total of two smoke rounds. That gave my 9-2/.50 cal combo the opportunity for a ton of 8-1 and 8+0 shots, and I rolled well enough that Brian's SAN of 4 was activated early and often. The Japanese infantry melted away under that punishment with a lot of K/ and KIA carnage, and by the end of the game Brian had his troops in great position but there weren't enough of them left. The funniest part of this scenario for us was an SSR stating that the first American 6-6-7 to pass a non-HOB Morale Check automatically Battle Hardens and creates a Hero. The first MC I rolled was snakes, and I got my BH and hero the standard way. After that one occurrence, Brian focused virtually all his fire on my 9-2/.50 cal/3-4-7. That combo passed tons of MCs and actually never broke but wasn't a squad, and so didn't qualify for the SSR. Amazingly, the entire game passed without the SSR ever being activated! I'd highly recommend the scenario, but thanks to the dice, our playing wasn't too incredible.

After that, Brian and I decided to try Transylvania 6-5000, featuring Hungarians trying to kick the Russians out of a village and/or off a hill. It's a pretty small scenario, but both sides get some interesting choices. I wanted to attack after defending in the prior scenario, and Brian was nice enough to take the Russians. He set up a nice little defense centered on the hill and left the village empty. One nice touch was using his dummy counters to simulate an extra tank. That's a tactic that is often overlooked, but makes it much harder on the attacker. I then brought my Hungarians on and over the first few turns showed Brian how to use smoke. The secret here is to roll low, and unlike the Japanese in the prior scenario, my StuGs went 4 for 4 on sD attempts and 3 of 4 on smoke shots. All that cover make it easy for my Hungarian infantry to push forward and by the time the Russian reinforcements were ready to enter, I was in great shape. This is one of the interesting parts of the scenario, as the reinforcements can try to bolster the hill defense or make a dash for the village to draw off some attackers with them.

Brian decided to reinforce the hill, which I was happy to see. I figured I was in such good position there that the extra Russians would make little difference and I wouldn't have to make the difficult decision of splitting my force. I got even happier when a lucky PF shot torched the Russian T-34/85 as it drove on. Feeling like victory was at hand, my Hungarians prepared to storm the hill. Brian wouldn't go down so easily though, and did a great job with his remaining T-34 M43 to really tear up my troops. My dice cooled down a little as well and my 4-4-7s, suddenly unable to pass 2MCs at will, fell back in disarray. The T-34 kept my StuGs from getting into a good position and suddenly disaster was staring me in the face. At this point, near the end of a very intense game and after hours of ASL and the consequent mental exertion, Brian made a major mistake in driving his T-34 into a more defensive position that happened to be outside the VC area. The tank was still a threat to shoot at me, but I no longer needed to destroy it to win. That was huge, because I was in really bad shape going into the last turn. I ended up having to get a lucky IF hit and survive a 24-1 CH to pull out a very very lucky win. If Brian hadn't moved his tank one hex or if my 8-1 hadn't survived that 24-1, I would have lost.

Overall, it was a great day, although I did feel guilty for dicing the host in one game and then stealing his well-deserved win in the second. It was also really good to see everyone and to meet Manubu. For everyone that wasn't there, I'll borrow a line from Australia and ask "It's ASL--where the bloody hell are you?" (disclaimer: bikini-clad Aussie babes not included)

Thanks for reading,

Zeb

Sunday, January 28, 2007

After Action Report: RPT3 Varosmajor Grange

I had the pleasure recently of battling the redoubtable Zeb in this scenario from the first Rally Point, which is produced by the Schwerpunkt guys. It depicts a firefight in Budapest in 1945 between Hungarians and Russians. The Hungarians are on the attack, with the opportunity to come from two sides. They must clear four buildings of good order Russians at game end. One of the victory buildings is on the left side as the Hungarian player faces the board. It is a large, 7-hex, 2-level building. The other three are all in a row on the right side, and each is just one hex in size, but with an upper level. Their force comes in two roughly equal sized groups, one with slightly better quality troops featuring a 9-2 leader, a heavy machine gun, a flamethrower, and supported by two Zrinyi II assault guns, the other rounding out their numbers with a few conscript squads, led by an 8-1 leader, and supported by a formidable Hetzer tank destroyer. On the defense, the Soviets have a fairly low-quality force considering the time of the war, containing 5 conscript squads among the dozen total, led by a 9-1 leader, but with their firepower bolstered with a heavy machine gun of their own, plus a medium machine gun. They are supported by a T-34 M43 tank, and on turn 2 a fearsome flame belching OT-34 comes riding in to the rescue.

Zeb’s defense looked like it was going to rely on holding something in the 3 small buildings area, because the large building had only one unit in it, and it was not heavily supported. Consequently I only brought a few units on my far left, including the 9-2 leader and the HMG, hoping to get to a level 2 location where he could harass Russians from a distance. The Zrinyis, having little to fear from the Russian infantry, moved right up in their faces to try to intimidate them with their large 105mm guns. A 20-flat shot is nothing to sneeze at after all. The Hetzer was tasked with hunting the T-34, which was set up in the road on the far right (the Russian left). The Russians did not contest many of the opening moves by the Hungarian infantry, mainly because they did not have line of site to them, as they moved up behind cover to get to the front line on the first turn. The main action occurred when a Hungarian squad moved out into the street to draw fire from the T-34. My intent was to bait the tank to shoot, thereby preventing it from being able to make a motion attempt when the Hetzer later bore down on him. With a 14 frontal armor factor, the Hetzer had very little to fear from the Soviet tank, whose 76L gun only had a kill number of 13. With APCR, the kill number would go up to 17 at 0-1 hex range, 16 at 2 hexes, 15 at 3 hexes, and 14 from 7-12 hex range. So even against an APCR round at close range the risk was minimal. The T-34 took the shot with its bow machine gun, enabling my little scheme. The Hetzer moved up to a couple of hexes away, and when the T-34 declined to shoot, the little agitator took a bounding fire shot needing a 5 to hit. The shot was true, and it wrecked the Russian tank (17 to kill against 11 armor). This bounding fire shot had about a 1 in 8 chance of succeeding. Had it missed the odds for a kill in the next prep would have been much better, say about a 1 in 4 chance. It was an auspicious start to the scenario.

Naturally the Russians skulked under cover in their half of the first turn, but on the far left flank a lucky HMG shot directed by the 9-2 leader broke the Russian squad manning a medium machine gun. The game was really starting out well for the Hungarians.

On the second turn, one of the Zrinyis got up close and personal with the lone Russian conscript squad tasked with defending the big victory building on the left. The risk in close combat reaction fire for the Hungarian assault gun was again minimal, considering the low morale of the conscript. It pinned on its pre-AFV attack task check, and was subsequently bum rushed by about 5 Hungarian squads and a leader. It took a couple of CC rounds to finish them off, but the outcome was not really in doubt. Meanwhile the Hetzer relocated a little bit more to the left, since it had to be prepared for the oncoming OT-34, by far the most dangerous weapon in the Russian arsenal. I was a bit worried that the flame throwing monster would go after my Zrinyis, but instead it drove up right behind the wrecked T-34 on my far right flank, and belched a 16-flat shot at a stack of Hungarians in a building on that flank, doing considerable damage. They all broke, and were out of the game for a while as they fell back and tried to rally.

The middle game saw the Russian luck begin to turn. I rolled well early, but now Zeb reeled off a string of threes and assorted other low rolls to keep my forces back. The fight was most intense in the middle area between the big victory building and the three smaller ones. My flame thrower team would carefully move up, only to be broken two or three times, eventually succumbing to a Russian sniper while taking cover in the big victory building. They never got a shot off. One of the Zrinyis tried the vehicular bypass trick again to limit fire opportunities from a Russian squad in the front line and thereby jumpstart my assault in the area, but this was no squad of conscripts. It was a seasoned group of veterans that wouldn’t be so easily intimidated. They deftly knocked out the assault gun with grenades in CC reaction fire. For sure, the Zrinyis are not ideal for this tactic, since they have no machine guns, giving infantry a +1 bump on their attack. The difference between needing to roll a 4 or a 5 to harm a vehicle in CC is pretty significant. The other assault gun wasn’t having much luck either, as it malfunctioned its gun! The Hetzer drove over back to the far right flank to take on the OT-34, but it could not do so without spending a lot of points in its line of sight, thereby allowing the Soviet tank to kick into motion and turn away for a quick escape, making it nearly impossible to hit. During the next turn or two, the Hetzer kept chasing the OT-34, only to see its prey kick into motion and escape each time, free to drive somewhere else and fry another group of Hungarian infantry. The hunt was made that much harder because the Hetzer dared not get too close to the flame throwing tank either. If it got up close to increase its odds of a hit and kill, and make it harder for the Russian beast, if it kicked into motion, to turn toward a covered escape route, it might have to endure instead a shot from the flame thrower. These are very dangerous indeed. Even if the Russian tank had to change facing to take such a shot, it still wouldn’t matter because there is no to hit roll. Instead, the flames allow an immediate roll on the kill table. Yikes.

Eventually though in the middle area, numbers began to tell and the Hungarians were able to push the Soviets back and gain a foothold. The Zrinyi with the malfunctioned gun now had the duty of driving next to as many broken Russian troops as possible to make them DM, and to force their routing in a direction to my liking. It could do little else unless it managed to fix its gun, which it failed to do for the remainder of the game. Otherwise the Hungarians tried to get their panzerschreck teams forward to prepare for the next attack by the OT-34.

The critical moment occurred, I think, in turn 4. The OT-34 had successfully torched a couple of Hungarian stacks of infantry, setting back the assault on the Hungarian right flank. Moreover, it had escaped the Hetzer twice. It now drove across toward the middle area, and a Hungarian panzerschreck team, thinking it was now or never, took a shot at 3-hex range. I think they needed to roll a 4 or less to hit, certainly not great odds. Not only did they miss, but they ate the backblast to the tune of a K/1, resulting in a broken half squad. Now the Russian monster, no longer having anything to fear from the PSK, drove over that way and gave the hotfoot to another stack of Hungarian infantry. The roll was a 10, however, and the ammunition ran out! The attack still counted, but it was only a morale check. The Russian tank moved on, and drove down the road next to those it had just attacked. From the upper level, a squad found a panzerfaust and, braving backblast of course, put a lucky shot through the hide of the dragon, creating a blazing wreck in the road. This wreck would now conveniently provide some cover for Hungarian infantry as they tried to cross the road to the last bastion of the Russian defense, the final three victory buildings.

There were other notable events in the mid game, although I can’t remember the precise order of their occurrence. The bypassing Zrinyi managed to casualty reduce a Russian squad when Zeb rolled boxcars on their CC attack. In another close combat, Zeb rolled snakes to recreate a 7-0 leader in roughly the same area where the previous 7-0 had been dispatched by the Hungarian sniper. The Hungarian sniper was active all game, breaking a key unit in the victory area fairly early, and then later eliminating the Soviet 8-1 leader in the final victory buildings.

With unopposed armor and a numbers advantage in infantry, the endgame was somewhat anticlimactic. Zeb did a great job getting the most out of his troops, but the writing was on the wall about how it would end, and using vehicular bypass and infantry firepower, the Hungarians were able to clear the victory area. This was another fun game against a great opponent. The scenario is worth a try. Give it a go and let us know how it went. I hope you’ve enjoyed this recap.

Tuesday, January 23, 2007

AAR: ASL 116 - The Sixth Blow

Zeb Doyle

This won't be nearly as polished as Nick's AAR from the other day, but I had fun playing The Sixth Blow with Eric last Saturday. The scenario has always tempted me since the card looks so interesting, with fleeing Hungarian cavalry fighting through partisans and a powerful German force entering to block off a mixed Soviet group of cavalry and tanks. The terrain is also a major attraction, with hills, valleys, woods, and streams all combining to make some very tough going. There are defensible choke points galore and of course the random rockets and airplanes only add to the spice.

I ended up with the Soviets and set the partisans up skewed very heavily to one side of the map, with a few units scattered in the middle as well. The far side of the map looked wide open, but was actually covered by the minefields. Eric quickly figured out my gambit, but decided it would be easier to face the mines than the partisans and readied his cavalry to retreat. Things started off with a bang as the rocket OBA came in and killed two Hungarian squads, but also blocked off a road, preventing my tank column from making much progress on the first turn. Still, the Hungarian cavalry didn't make it too far in their MPh, and by turn two, the Russian armor had caught up to them.

By the time the mid-game rolled around, the mines and Soviet tanks had wiped out the Hungarian cavalry to the last horse but were greatly slowed by the tough terrain and weapon malfunctions. Out of the six tanks, two .50 cals, and two airplanes available over the course of the game, seven of them were lost to the dreaded boxcars. That put more of a burden on the Russian cavalry, but they were up to the challenge, clearing out a Hungarian rear-guard with a saber charge and scaling the board 50 hill to destroy a machine gun nest.

Still, even the toughest Cossack has a tough time fighting tanks, and things began to look rather dicey for the Soviets towards the end. Even if the Soviet tanks weren't largely malfunctioned, the terrain is so difficult to maneuver through that it's almost impossible to get onto the vulnerable flanks of the Panthers. This brings up what I feel is the key match-up of the game: the Soviet aircraft vs the German armor. In my game, I targeted the FlaKPz IV/37 early and knocked it out. That left the planes free to carry out a lot of point attacks on the PzIVs and the Panthers, and even with net 5TK and 6TK, it was enough to get the job done. I lost one plane to a boxcarred attack, but by turn 8 all the German tanks were taken out as well. A late game kill of the last Panther was the difference, and a final cavalry charge cleared the way for the Soviet armor to slip off for the win.

Overall, the game was fun but wasn't as cool as the scenario card suggested. In its favor, it's the best venue for cavalry I've ever seen in ASL. I had units doing charges, dismounting to mop up, and then climbing back on their horses to head up the next hill. Every horse that got shot was a major loss, and the overall effect was very cool and something I haven't experienced in any other scenario. Ultimately, though, the game seem to come down to the German tanks and the Russian airplanes. There's not a lot of skill involved in that match-up aside from trying to roll fives and sixes, but I have a tough time seeing the Russians win if it doesn't happen. The fact that the scenario seems to center around a dice-rolling contest definitely makes it less interesting for me, although I still enjoyed the overall game. The last interesting point regarding this scenario is what to do with the Hungarian guns. Eric used them in conventional fashion and managed to blast a few Russians, but I'm wondering if putting them in the back and pushing them off for another 8 EVP isn't a better way to use them. I know Bryan and Brian have played this scenario; you guys have any thoughts?

Thanks for reading,

Zeb

AAR: SP12 - Piano Lupo

Nick Drinkwater

German / Italian: Nick Drinkwater [ELR 4/2, SAN 3]

American: Ken Havlinek [ELR 5 SAN 2]

The underused Board 11 with the two low flat hills makes a nice change for this 4.5 turn, single-session playing scenario from Schwerpunkt. The Americans have to eject a small and brittle 5 x 346 strong Italian platoon from out of a large fortified, 2 level stone farmhouse (introduced on an overlay) and one of two 157 pillboxes. These Italians are stuffed to the gills with automatic weopons (HMG, 2 x MMG and a LMG) and have been stiffened by a single German 468 squad and an 8-1 out of the Hermann Goering Division with another Italian MMG - this all sounds impressive but the US are a mighty impressive force themselves with 4 x 747 para squads, 3 x 337, 2 x (dm) MMG, a Bazooka and 2 x (dm) 60mm MTR. The Americans have very tasty leadership for such a small section with a 9-2 and a couple of 8 Morale leaders, and this compares favourably with the 8-0 and the 7-0 of the Italians.

Setup restrictions mean that the Italians have to start a MMC in each pillbox and they need to be within 5 hexes of the Q4 overlay farmhouse - I place them separately, one on each of the two hills to the north of the farm, with LOS over the farm complex (south) and the approach over the hills to the east. I strengthen these more by placing trenches adjacent to the pillboxes to create bunkers, which offer to act as much more defendable fortresses than is possible by just using an isolated pillbox alone. The important thing with any pillbox is to make sure the pillbox hex location and blind spot approaches are covered by other forces and the bunker tactic helps this a lot - any Italians stuck in a pillbox will clearly be doomed in CC when these Americans get motoring, so its important to try and prevent / delay such access by the US Paras before they get there as much as possible.

Due to time limitations, I was rushed on the setup and struggled to place the two pillboxes optimally with covering fields of fire - probably the best way is to connect the farm back up to mutually covering pillboxes on the hills just to the north through use of the trenches so that when the time comes to give way, a fallback retreat could be conducted. With my defense however, I had separated the two pillboxes from each other and the farm - this was good as it would mean that Ken's force would probably have to split into two and hence weaken it's overall thrust, but it also meant that the defenders of the farm would have to hang tough for almost the entire game as there would be no place to retreat, and with one or two bad rolls I ran the risk of being defeated sequentially and quickly - perhaps asking a bit too much of this small defending force. Anyway, I stuck the Germans on Level 2 of the farm together with a 346 and an MMG, put a 346 squad in the outlying southern shed of the farm to cover any quick dash by the Americans from the southern woods, and then put a 126 half squad in each pillbox together with a squad, MG and a leader in each trench element of the bunkers.

The US has the option of coming on from the east - a longer trek in, probably taking at least 2 turns just to get to the place to start attacking (and no margin for error in this approach) - or come in from woods on the south side of the board either side of the Q road. This meant that is was only 2-3 hexes distance for the paras to be onboard and assaulting the farm, but also some less pleasant open ground to negotiate. Ken opted for this direct approach, putting half squads with each mortars on both flanks and then driving the bulk of the force up the left hand side of the road. A single halfsquad swung west to try and sneak onto the back of my westernmost pillbox, but I quickly shoved my entrenched squad into wall advantage to slow their advance to a crawl - Italians theymaybe, but even Italians can wreak damage on targets moving in open ground.

The main attack in the middle was just plagued by misfortune for Ken - immediately I thought I was in for some big trouble as one of Ken's Para squads shrugged off a 2 check from the Italian HMG which then X'ed on its next rate shot. This was swiftly followed by more X's by the German MMG and a LMG and it was all looking a bit grim. However, Ken then just tweaked the nose of misfortune when he rolled the first of five "sixes" for smoke grenade placement out of nine attempts in the game (and these Para bad boys have "3" smoke exponents). In a short 4.5 turn game, the loss of this much manuever capability is a really tough thing to recover from, and even more so when you're in a Schwerpunckt scenario where the emphasis is usually on the attacker to move and keep going.

Even when he did get going, my Germans made short work of a Para squad with a nice 16-1 "eyes" and Ken really struggled to put together any big fire groups as I successfully kept the odd crucial squad pinned, broken and most importantly DM. This ensured that many of Ken's attacks were 6+4 and 8+4 instead of 16+2 (the 9-2 and two squads all pinned on one really crucial moment on a lowly 6+2 shot). I also got very lucky when Ken's Bazooka Xed on its first shot (8FP HE equivalent attacks are nasty!) and I managed to survive unscathed a crucial 2 check myself from one of Ken's big attacks. Even when the Germans did eventually break, their superior morale meant they were able to rally straight back on a 6, despite being DM (rally terrain with the 8-1).

Eventually Ken did sneak 2 x 337 hs onto my western most pillbox and they were confidently expecting to crush the 7-0 and the 136 inside (which had been broken by the only effective sniper the turn before), but the 7-0 refused to bow and managed to CR one of the 337s on his own 1-4 CC attack roll of a 3 - posthumous medal for him! The other 337, unable to advance into the pillbox was then caught with its pants down in the open by the K/2 roll from an adjacent 346 in the trench in German Turn 4 and that was effectively it. It was now Turn 4.5 and Ken had still not quite taken the farmhouse and I was conducting a "fill the stairs with bodies" defense there and there was no way he was going to be able to even get near to taking either of the pillboxes now. We did play it out, and even though my German 468 did break, a hardy 346 hung tough on Level 1 and kept control of the crucial farm.

A fun but quick scenario which is actually much tougher on the US than it first looks - the +4 fortified farmhouse is a really tough nut to crack and bunkers are hard things to successfully get into without having some time to suppress the defenders first. Ken tried every trick he had in the book with lots of great use of firegrouped advancing fire by the Paras and multiple hits (but no crits from the mortars), but the loss of the squad to the "eyes" and the failures to move when looking for smoke cost him the match. Missing a couple of critical MCs hurt the Americans a lot as it took Ken until the last turn to get in a 20+4 Point Blank attack from the Paras (my Germans melted under that one), but by then it was too late. Overall, this is a great scenario to have a nice short refresher on the mechanics of placement and mechanics of pillboxes and bunkers, and hell, when isn't it fun taking on the challenge of the Italians?

Nick

Tuesday, December 05, 2006

AAR: SP74 - The Last Tiger

Doyle Motes

Dec. 2 saw Alan King and I square off in a battle of large tanks and Infantry (SP 74 The Last Tiger).


Alan was the Jackbooted Germans and I was the Red Dogs of War the Russians. Object was for the Russians get infantry and tanks inside a set area controlled by German infantry and the cream of the Panzer forces (a tiger, a Nashorn, and a SPW 251/22). Simple task you say -- I think NOT! The Russians have several tanks in there force form the IS-2, T34/85, ISU 152, and M4/76a - but will this be enough to meet and beat the Jackbooters. O yes the Germans have the height advantage and the Russian tanks must cross some open ground. The task is grave for the Russians and SPEED and Lady LUCK has to be on your side.


Russian's have to have there troopers as riders to be able to get enough infantry across the board to offset the Germans holding the high ground, woods, and town buildings. The Russians move out and quickly encounter the Nashorn on the hill and his fist shot miss no rate, but Alan decides to go for an IF shot. You guessed it the tank rolled to at stop dead. The rider breaks and then reduces to bailing out. But, the crew did escaped. The SPW 251/22 pick out a tank and shoots bing a hit but does not destroy it. He now shoots again due to rate and misses. The Russian tank is now protected by the woods. The other Russian tanks move into position to address the two German vehicles on the hill. Infantry moves up. The Advance Fire phase turn 1 - saw the Russian's shoot at the Nashorn from behind a stone wall --- Load --- Fire and hot metal rang out form the T34/85 and as the dice slowly stop it was 1,1 (Snakes Eyes) the song of death for the Nashorn. It erupted in a blaze of glory for the Russians and Alan's smile left his face. The next tank to shoot upon the hill was the ISU 152 (crew exposed) its target was the SPW 251/22. A TH 3 was need and a three was rolled. The shell left the tanks and hit the SPW 251/22 ht the to kill roll was a 12 (Dud). That tanks was able to escape and soon to slap the Russians again. The other 251/1 ht was hit by a M4/76a -- that ht was turned into a burning mass of metal. Turn 2 saw the Russians moving for position but the HIP Tiger as not to be found. The Germans now started hitting the infantry as they press for position. But, again the Germans roll a 12 with there MMG and a key position had to be surrendered to the boys from Moscow. Turn 3 was a turning point for the Germans they were able to break some Germans in a stone building and the flood was on for Stalins hoards. A T34-85 moves in for the kill on the SPW 252/22 only to be sighted by the --- He fired and missed the Russian had little choice but to move closer to the tiger (open ground and no cover). Alan's tiger decided to IF and belched another couple of hundred pounds of hot metal and misses again. The T34/85 decides to move between the SPW252/22 and the Tiger. But, before the Russians can even get off a shot the German's in a building decide to go for a PF. Yes, after facing the cold blooded Tiger the PF form a building does him in(he does not burn). Two more Russian tanks move into position to cross swords with the mighty beast. The new IS-2 move up on a hill over looking the SPW 251/22, Tiger, building full of infantry and leader. A T34-85 after moving and being CE fires on the Tiger (from hell) and BOOM it was now dead and the crew escapes. The other tank shoots at the units in the stone building and Snakes are rolled. German units break due to cannon fire. Infantry now move into position to be in the victory locations by end of game. Russians try to use a PSK to fire on the IS-2 on the hill and decided to eat the back-blast. They missed and broke due to back-blast. As turn 4 rolled around the Russians decided to shoot the Infantry in the house just below the IS-2 that had used the PSK on them. Load -- -Fire--- Boom again 1,1 belches from the 122L gun -- that group died in a blaze of glory of Iron Cross. At this point Alan decided the Germans had - had enough and surrendered.


This game was fast and deadly for both sides. I would rate it about 9 on ROAR. Play it you will like it.


Alan, I enjoyed it. As Jay Harms says it is better to be lucky than good. The number of snakes you and I rolled made for a deadly game.


Doyle Motes

Wednesday, November 29, 2006

AAR: J106 - Marders Not Martyrs

Zeb Doyle

Mmmmmmm, Thanksgiving weekend...it's tough to top food, family, and football. This year, I did manage to improve the holiday formula by ditching the family and heading to Eric's for football plus ASL. Now that's a combination that's impossible to beat. The football wasn't so exciting, with UT going down meekly to A&M, but the ASL more than made up for it. Inspired by the stellar AARs from Nick and Tom, we decided to try J106 Marders Not Martyrs from J7. The previous AARs did a great job covering the scenario, so I thought I'd try more analysis and less narration here.

We'll start the analysis with the VC, the heart of any scenario. The Russians win by exiting 17 total EVP, which must include at least 3 infantry EVP. Although they have 51 EVP in their force, the Russian ground-pounders have only 6 turns to go 15 hexes. This is a relatively rapid pace, especially given the open terrain, and it would take terrible German play or amazing luck to achieve anything close to 10 EVP with the infantry. Instead, the vast majority of playings will revolve around the exit of two KV tanks and a handful of squads. Clearly then, the KV tanks are the key to the game, both for their combat power in clearing a path for the infantry and for their EVP potential.

Since the Russian tanks are so vital, let's examine the AFVs of both sides. The German Marders are pure tank-killers due to the limited HE and lack of machine guns, while their weak armor and OT nature means that even the Russian light mortar is a threat. To make matters worse, the Marders aren't even very effective tank-killers here, as their net 6TK against the frontal KV armor puts the German on the wrong side of the bell curve. Although the possibility of APCR and the 2 ROF help, the German has to expect more Shocks and Immobilization than outright kills. Given this fragility and lack of punch, it's even more important than usual to avoid any situations where the KVs can gang up on an isolated Marder.

On the other side of the board, the Russian tanks have a few disadvantages of their own, such as the red MP numbers and the requirement to stay buttoned up to fire, but the 76mm MA auto-kill against the thin Marder armor outweighs those minor flaws. The KVs are also extremely durable; as we saw above, the Marders need a good roll to kill them and the German infantry has no hope other than CC to hurt them. In short, we can expect the KVs to dominate much of the action. Their major challenge in the scenario is that they must move to confront the Germans, thus giving the Marders the first shot. This is always a tricky proposition, especially since the Russian cannot afford to lose more than two tanks. As a final note, the KVs must be careful not to engage the Marders at extended range. We all know about the red vs black TH numbers, but here the small CE Marder with the 75L gun has a major edge over the large BU KV with the 76 gun. If the two forces simply parked on their respective hills at 16 hexes apart and shot it out, the Marders would start with an amazing 10TH vs the 5TH for the Russian.

Now that we've crunched all these numbers, let's step back and picture how the overall scenario might play out. The Germans, both with the infantry and the AFVs, have the advantage of ROF and range, so we can expect a defense in depth. The entire set-up will be intended to funnel the KVs onto the Marders, which will be safely towards the rear. The Russian light mortar is a concern here, but not enough of one to influence the Marders placement. Given the opening ranges, the MTR will need a 5TH and another 5 on the IFT to do anything, which isn't too deadly. To prevent acquisition and multiple fire phases of attacks, we'll set up the German HMG to duel with the MTR in an attempt to remove that threat early. Additionally, the HMG will be manned by a HS to make the defense less fragile and free up another scarce MMC for use elsewhere.

The Russians, meanwhile, would love to match up their infantry against the Marders and the KVs against the German infantry, but this is very unlikely to happen. So, the Soviet infantry will trade in the 8-0 for a commissar and push forward as best they can, with an eye towards CC and pot-shots at CE German AFV crews. Since the Marders armor is thin, even machine guns may be pressed into use as tank-killing tools. Meanwhile, the KVs will look to mass against a single Marder and fight at a range of two to six hexes. As we saw above, shoot-outs at seven or more hexes give the edge to the Marders, while the increased chance to hit at one hex is not worth the net TK change from 6 to 7.

With this hypothetical model scenario in our heads, let's now examine how Eric and I actually played it out. Both sides set up almost exactly as described above. The 50mm MTR got one shot at the Marders, missed, and (like everyone else in TX, apparently), was KIAd. The infantry of both sides then proceeded to clash in a profoundly non-decisive fashion. The key to the game came in the tank battle, when three KVs managed to isolate a single Marder at three to four hexes. The Marder Stunned two KVs but then was hit and flamed by the third. The remaining Marder maneuvered to clean up the Stunned KVs, but one of the Russian tanks unexpectedly came back to life and blasted the offending German into scrap. Although a brave landser destroyed the remaining Stunned KV, the loss of both Marders left three unopposed KVs. At that point, Eric and I pulled out our notebooks and wrote 'Game Over.' We played it out for posterity's sake, but the Russians triumphed with a turn to spare.

Anyway, analysis aside, it was a fun scenario that we managed to knock out in a lesurely three hours. Thanks again to Nick and Tom for bringing it to the attention of the list. I'd recommend it as well as a very fun 'lighter' scenario. Finally, if anyone has a strong preference for my analysis AARs over my narrative (or vice versa), I'd like to know.

Thanks for reading!

Zeb

Tuesday, November 07, 2006

AAR: SP34 Frankforce

At yesterday's game day Doyle Motes and I matched up in this scenario from Schwerpunkt. I wish I had brought my camera to take photos of the game in progress, but I forgot. So we'll just have to make do with description. The scenario is played out over the relatively open countryside boards 4 and 43. The British must exit 26 points through the German defenses. But they are not allowed to exit across the entire board edge, but rather through a range of hexes that are roughly in the middle of the board edge (hexes M through Y if memory serves). To do so they have 11 first line squads, 6 Matildas (marks I and II), and a MkVIC tankette. The tankette is very fast but also very lightly armored, whereas the Matildas are slow and reasonably heavily armored. They are further slowed by the lack of radios in the Matilda Is. Opposing them the Germans get 7 first line squads led by a 9-2, a 37L gun, and two 88L AA guns.

Since the British can enter along the entire north side of the map (board 4), the Germans must deploy their forces in such a way as to be ready for any angle of approach. However, the speed (or lack thereof) of the tanks means that the British cannot dawdle. In fact, the tanks probably have to remain in motion for most of the game to have a reasonable hope of exiting. It would be very unlikely for the British to get the needed 26 exit points without the majority of them coming from the tanks, so clearly the 88s are the centerpieces for the German defense. An SSR even allows the German to ignore one non-intensive-fire malfunction by one of the big guns, further underscoring their importance to the game.

From the German perspective, the map has the board 43 walled compound or village just to the right of center. The rest of their backfield is dominated by grain. I set up the 88s in a manner such that each covered one of the extreme ends of the exit area, but so that they also could cover the middle together, and lend some support to each other as well. The 37L I put on the extreme left flank looking back across the middle, hoping to surprise some tanks with a rear shot if Doyle came that way. Most of the infantry went into the village, with a couple of half squads as close to the exit area as they were legally allowed, with the aim of moving to the exit hexes immediately and digging in.

Doyle sent his British troops in a massed attack on my right flank, oriented toward and around the board 43 village. The very early game was fairly uneventful as my Germans tried to harass his infantry as they moved forward through the grain. Small results were achieved here and there, but no big deal. On the second turn I managed to get the 9-2 and MMG into position in the village to lay a nice fire lane across the British avenue of advance. I thought this would probably do a good job in slowing the British attack. However, one of his first few units to move outside the fire lane went berserk due to another shot, and started charging the MMG position. As soon as they entered the fire lane the MMG malfunctioned. This opened the floodgates and Doyle sent his troops pelting forward hard. As they got closer to the village to prepare an assault, most of the British tanks continued their slow platoon movement around the edge. The exception was the speedy MkVIC, which Doyle used to scout. He had a pretty good idea where my guns were and sent the tankette searching for them. Given the axis of the British attack, one of my 88s was in a key spot and the other was somewhat (but not entirely) out of position. My key 88 was in a brush field in front of a stone building guarding the right and center of the exit area. As it became obvious that Doyle was going to discover this gun and probably overrun it, I had to reveal the gun and spin it to take a shot at the tankette before it was too late. I decided to take the shot with the tankette two hexes away, so that there would be the opportunity for an intensive fire shot if I missed. The shot was true, however, and the pesky vehicle was set ablaze. Doyle seemed pretty content with this result, because the blaze would provide a bit of smoke cover. But really the more insidious effect was that the blaze could spread to the brush and eventually cook the German gun! And the blaze did spread very rapidly indeed. It spread, well, like wildfire.

Fortunately the showdown at the village took a turn in my favor as the German 9-2 leader directed an attack that broke several British and limited their fire opportunities. This looked like it would stall the attack quite well, except that Doyle countered with a critical hit from his light mortar, and effective machine gun fire from one of his tanks to break the 9-2 and a couple of squads. It took them a couple of turns to rally. In the meantime back at the gun position, nearby German half squads moved in to try to hinder the spread of the flames to keep them away from the gun, which had destroyed one of the Matildas that it could see to the right of the village. They could slow it down but they could not stave off the flames forever. Would the blaze cook the gun in time for the British to make good their escape? The fire was already providing some smoke cover. Ultimately they bought enough time for the 9-2 to rally and bring over a couple of squads to the gun position to keep the flames away just long enough. Toward the end Doyle kept wishing for a wind change to kick up more smoke to cover his exit, and dang it if he didn't get it, almost calling his shot on the wind change dice roll. Wow. Fortunately for me the direction of the wind was away from the gun, which made it a little harder on the fire to spread to the gun, and also rolled the smoke back toward the British tanks rather than on top of the gun. In a little bit of irony, the smoke cover Doyle wished for actually helped the German cause by making movement for the very slow tanks even more expensive, costing several of them their chance to exit in time. Some British infantry had pushed hard all the way down the flank to support the tanks, but on the last turn the Germans shifted some infantry over to occupy the exit hexes to prevent and British infantry from exiting. The other 88 actually ended the scenario with an unlikely hit on one of the last Matildas with a chance to exit.

Overall this scenario was a pretty fun experience with a few key events. The berserker helped the British forward somewhat, and the loss of the tankette burning in the brush had a huge impact. I don't think I've ever played a scenario where I've made so many attempts to hamper flames. And then of course calling for, and getting, a wind change was rather amazing. If I were the British player I think one thing that would bother me would be the need to keep the tanks moving nearly all the time, rather than fighting. As the German, I think there isn't a lot of mystery about where the big guns should go, and I don't often like feeling that constrained in my setup, although it certainly makes setup relatively easy and quick. It appears quite balanced on ROAR (23:22 Brit), and plays rather fast, so it's probably pretty good tourney fare.

Sunday, October 29, 2006

AAR - PEGASUS BRIDGE CAMPAIGN - Part III

Ed Beekman

Dawn, Sean Harris:British, Ed Beekman:Germans

As discussed earlier, I bought a Panzergrenadier Company and Platoon as well as a platoon of GSW 39H (f) self propelled artillery. The infantry reinforcements were full strength but Jabos must have hit the vehicles along the way because they arrived depleted. The infantry platoon received an 8-0 leader and a full complement of support weapons. The company received a 9-1, an 8-1 leader and all allotted support weapons except they had no HMG. The sole GSW 39H received a 9-1 armor leader, extremely useful for an open top vehicle. I also figured that I would need to spend the last CPP on FPP to create HIP and dummy stacks. Otherwise Sean would see only real units and every shot would put real squads at risk. I placed a HS HIP in the orchard next to the Town Hall overlooking the valley and a full squad HIP in the forest road hex into Le Port. I used ten concealment counters as dummy stacks.

My objective was to get my reinforcing infantry into the front line. The infantry platoon would move to the chateau, put the MMG and Lt Mortar in the Second Level and Roof to interdict movement along the river road. The rest of the platoon would move to reinforce the blocking force on the road into Benouville. The infantry company would move as fast as possible to get as many troops to reinforce the brittle garrison in Le Port. Sean’s main objective was to expand his bridgehead.

Maneuver dominated the early turns of the scenario. My reinforcements double timed towards their objectives, although I shifted three squads from the company to reinforce the east approaches to Benouville and another three to the north approach. Sean snuck paratroopers through the streams north and south of the bridge and formed up to assault along the west road to Le Port and towards the Town Hall. My units directly confronting the British continuously skulked out of LOS during my turns and whenever possible would remain there to regain concealment. The +1 dusk attack drm combined with stone building or wall covers made +3 or +4 attack modifiers common and there were even a few shots in the game with a +5 modifier. Of course I usually had 4, 6 or 8 FP attacks but Sean, on the other hand, usually had 12, 16 and once got as high as a 36 FP attack. The power of these attacks just wore away at my units and tested my ability to rally them back into the line.

When the shooting started it did not go well for the Germans. The first shots wounded and ELR’d my new 8-0 leader and casualty reduced and ELR’d one of my two elite squads. The GSW 39H found a good firing position in the behind the Town Hall so it could hit any Brits that tried to make a move on Le Port from the crossroads building cluster. Unfortunately it Malf’d its MA on the second shot and it was several turns before it finally repaired it.

The Town Hall/School House building cluster fell when a Conscript squad disrupted from a good shot from Sean and then later in the turn the only other squad broke due to sniper fire. Sean infiltrated a squad of paratroops and cleared the buildings before my troops could reinforce. The loss of these buildings was a boon for expanding Sean’s bridgehead and a blow to my containment efforts.

Around this time I found a collaborator in the local populace who revealed the location of a HIP British 6 pounder AT gun. The info was very useful, if my SPA had moved a little more to the north it would have come into its LOS with potentially dire consequences.

Sean kept shooting at the squads in the treeline shielding LePort but they held their ground. I even generated a hero on the west flank, who bought time to reinforce his position, at the cost of his own life, when his original squad broke and routed. The southern line would not be breeched although some Frenchman ratted out my HIP squad in the forest road.

The eastern approach to LePort was another story. Two groups of paratroops infiltrated up the stream, crawled up to the crest, drove back the defenders and charged into the tree line. The fighting was bitter and frequently turned to ugly melees. One German squad escaped by luck of ambush and withdrew to continue the fight. Some of my conscripts weren’t so lucky. One British team moved to clear the buildings to the river road while the other drove in towards the church with its steeple that gives the Germans a sniper bonus. The squad and leader clearing the way to the river road succeeded in its mission all the way to the last building at the river road intersection. Here defender and attacker alike met mutual destruction in melee. Only an abandoned French-made LMG scrounged from a Hotchkiss tank remains to show what happened there.

The other, more powerful stack reached the church, driving off the wounded 6+1 leader and disrupted conscript half squad occupying it. They also scared off my Hotchkiss tank, their PIAT threat caused me to move it around the stables to the west and it never got back into the fight. The 1st line HS in the steeple proved to be another matter. It took everything thrown at it even though encircled. They proved to be full blown Nazi fanatics, laughing off a 24+4 attack by becoming an Elite HS with a Hero. When the scenario ended the Brits still controlled the ground level and the Germans in the belfry survived the encirclement 1TC. The next scenario will start with the British Isolated in the church and I have a Fanatic Elite HS isolated in the steeple. Unfortunately, Sean’s sniper twice got kill shots on my sniper and since I don’t control the church my SAN will not get a bonus in the next scenario.

In the south the MMG squad and Light Mortar team in the chateau made the British move cautiously. The Light Mortar was not very useful. It once went on a six shot ROF tear. Net result, one MC passed by both affected squads and five, yes five, British SAN’s of which two were successful. I was grateful when the mortar malfunctioned and X’d out. Sean tried to use the 50L AT gun against the MMG but it was lost on about the third shot.

Then disaster struck. My 10-2 stack keeping the Brits at bay, it had killed a 7-0 leader and broke two squads of paratroops, broke on a 12 +3 attack. I had a major rally point in the woods south of Benouville. The 10-2 attempts to rally and… I can’t stand it….Boxcars…2LLMCs all around. Not only did I lose the 10-2, but the wounded 7-0 broke and ELR’d, a broken squad CR’d and ELR’d and another broken squad was eliminated by boxcars. Fortunately I was able to thin my lines out to cover the loss and still keep the Brits at bay.

About half a dozen squads with some support weapons made the run through the valley south of the stables and were able to get to Le Port with a help from Smoke from the GSW 39H. Unfortunately the GSW 39H eventually ran out of smoke and was unable to replenish that ammunition type during refit for the next scenario.

In the end, the British were unable to expand make any inroads against Benouville itself, but Sean consolidated the buildings between Benouville and Le Port into his lines and well as break up the defenses on the east side of Le Port. His losses were fairly light, four leaders dead (all 0 leadership modifiers except for one 8-1), one squad dead and another relegated to Walking Wounded status. I had considerably higher casualties, eight squads lost although the vast majority were quality garrison troops, a Hero and the 10-2 leader. I had achieved my goal of holding Benouville and reinforcing Le Port while Sean had achieved his goal of expanding his bridgehead.

For the next scenario, Day I, both sides will see improvement in leadership. Sean had 9-2 leader become a hero and he will return as a 10-2 leader. My wounded 6+1 leader in Le Port was declared fit for return to full duty by the medics after his wounding at the beginning of the Night II scenario.

I will receive 32 + dr of CPP for the next scenario while Sean will receive only 15 FPP. It will be harder on me to drive him back because there will be no +1 dawn modifier to non-CC attacks to soften those expected 12 and 16 FP attacks. I have yet to contemplate my reinforcement purchases but I need to look at what I can do to help Le Port. It is vital to any attempt to smash Lovat’s troops in the Day II scenario.

There will be more heartbreak and blood shed around Pegasus Bridge now that the Normandy Landings are in full swing. The Germans have one counterattack opportunity left before the first Brits arrive from the beaches. We will let you know how it goes at a later date.

Ed

Game Photos: Expelling the Guards

In Banzai 11.1, I wrote an analysis of Expelling the Guards. Having witnessed several playings of this excellent scenario at club game days I thought it would make a good subject for coverage. At one game day (May 2006 I think) I was able to take some photos of games in progress. Here you see Rick's Germans going with a strong German left hook attack, just the opposite of the direction I illustrated in my article. In the next photo, you can see the lead tank getting sent home by a sniper.

The infantry follows hard on the heels of the tanks, hoping to roll up the hill from on end to the other.


An exciting little sideshow developed in the Russian rear where Scott's valiant T-60 caused quite a headache for the Germans.


Finally there was a last stand by the remaining Russians at the end of the hill.


Sam and Eric duked it out in the other match. Eric's Germans also chose to go with a strong left hook.


But there was a bit more fighting on the front side of the hill this time.


Just when he needed it, Eric got a smoke barrage down on the hill.


This one also came down to a last charge across the hill, with the Russians just barely hanging on for the win.

Thursday, October 12, 2006

AAR: J105 - Borodino Station

Nick Drinkwater

Russian: Nick Drinkwater [ELR 3, SAN 2]

German: Stephane Graciet [ELR 3, SAN 3]

Journal 7 is turning out to be extremely cool - yet another quality scenario from it to keep the masses happy. This one is a powerful little gem that is small enough to be done in a single evening sitting, big enough to be forgiving of some bad or good dice, has tactical conundrums for both players to beat and is real Russian Front, "in your face" ASL.

For this one, we turn to the grinding stage of Barbarossa - it's now October 1941 and all the easy wins are over for the Germans - now they're starting to get a feel of what it is like to face the endless hordes of Russian peasants who just keep coming, no matter how many you mow down with your automatic weapons. This one is set on hexrows R-GG on the awesome Board 20, probably the best of the old Beyond Valour boards for the variety of terrain contained therein. A single railroad has been added to the board to create the small town of Borodino, scene of an earlier famous defeat of a nasty invader of mother-Russia in the previous century.

In this scenario, the Russians have a tough 'ask' in that they have to control either or both of two large stone buildings (either the 'station' building or the 'city hall') and also have three squad equivalents across the southern most board-wide road in the German backfield - all this to be done over 5.5 turns (and the Russian moving last is important for the assault move / advance options available to them to get the win). Sounds tricky? Well, yes it is, but they get a superb force to do this - 3 x 458, 6 x 527 (assault engineers with smoke exponent of 2) and 9 x 447 which is probably as good as it gets for 1941. Even better, they get some superb leaders in the form of a 9-2, 8-1, 8-0 and 7-0. On the downside, there are virtually no support weapons for this very mobile strike force - just 3 x LMG. Pah! Who needs those clunking great Maxims anyway? We're on the attack!!

Facing off against this finely-honed battlegroup are advance elements of a German armoured division. With their ELR of 3, they've clearly been through a few tough fights along the way, and there are some holes starting to appear in the ranks - automatic weapons is the way to go! In the station, the Germans get 3 x 467, a LMG and a 8-1, in City Hall, they receive 2 x 467, an HMG and an 8-0 and finally they are allowed the option of 3 x 467 to scatter across the defence line to help plug the gaps, as well as 5 x ? to spread around to make a couple of dummies. Even with the best will in the world, thats never going to hold back Ivan and in Turn 1 a small but potent relieving force arrives, consisting of 1 x 9-1, 3 x 467, 1 x 468, a MMG and 2 x LMG who are providing foot escort for a Hanomag and a Pskw 221 (the "leedle tank" for those who have ever seen "Allo, Allo!"). Options, options everywhere.

This game kicks off nasty and brutish from the start - the Russians arrive from offboard straight into the open-ground and woods 'teeth' of the German defence, only one, two or three hexes away from the fronts of both objective buildings. Looking at Stephane's defence, I see a major gap on the west side where I can left hook around, enfilade City Hall and be running into the backfield, with effective bypassing of the defenders of the Station! YES!! Uhhh, wait for it, NOOO! Xavier Vitry, the designer, also saw this fabulous plan, and outlawed it in Turn 1 by making Russian entry occur between AA-R, and only allowing full north side entry on Turn 2 or later - make sure you catch this one...

Anyways, quickly I re-setup and this time we're doing it - straight into the jaws of death at the Station. With that many bodies to get onboard over such a short entry area, some guys are inevitably going to enter open ground adjacent to the Germans on Turn 1, but it is important for the Russians to do some stack management pre-start so that brokies have somewhere to rout to and that your better squads get to use some of the small amount of initial cover. I scatter the assault engineers around to try and use their smoke grenades to hinder some of the firelanes coming my way - what stinkin' smoke grenades would those be? They obviously got left in the mess in Moscow as I never saw one all game (about 9 attempts!). I also use the two Commissars to help get those guys back into the frontline - and yes, you can have two, and I think the Russian needs both of them.

The first wave piles in - Stephane's first two rolls are twelves! I like this game!! Especially as this puts final fire on both squads. His next two rolls are better and the HMG firelane is nasty. Now there are two things that happen in ASL games I play: I will have a really ugly rolling streak for at least one turn and I will fail each and every 1,2 and 4 -1 and -2 Residual Fire Morale Check. In games against Stephane, this will be compounded by two extra events: I will never, ever successfully ambush him and no matter how lousy he is normally rolling, he will always, I repeat always, find the absolute, "fail this and lose the scenario", must-have die-rolls when he needs them. This was to be no different.

I assault move into a bunch of 1-1 and 2-1 Residuals and come reeling back, always broken, often reduced. Luckily I do find one roll with the 9-2 stack that just breaks the 8-1, LMG and 467 in the point-defence hex of the station - these guys roll back and split open the station defenders. Even though my first line has gone down in a wave of bullets, the awesome commissars are doing their rally- factory tricks and sending the peasants back to the front line, after a few summary shootings to encourage les autres (I self-killed a squad and a half overall). With the chink in the factory defences, I manage to rush a squad around to the station west side to enforce a FTR on the LMG squad, break a second 467 on a crucial FPF attack (who then die on FTR due to No Quarter being involed) , and then jump into melee with the final 467 Station defenders.

On the other eastern side of the board, I also crucially break the 8- 0 and HMG/467 in City Hall and then critically force the other defending 467 to drop concealment on a gacked attack. Stephane is faced with a tough decision at this point - should he stay to try and rally and then get the HMG firing again or run and get bodies back into the fight later? He takes the safe action and runs back to the backfield and I waltz in and pick up the Germain HMG! Yesss! Following this, I then jump into Melee with the last City Hall 467 with a couple of my own squads. We then, of course, both proceed to fumble all our CC rolls, but at the end of Turn 3, all the initial Germans are either dead, in melee or running away.

Stephane's Hanomag whacks one of my squads on a very long AAMG shot on a thin-but-there LOS which was a bit needless and wasteful on my part, and his 8-1, MMG and 468 reinforcements are now entrenched in the stone building overlooking the Board 20 "circle" (familiar to those who've played "To the Square" and "Acts of Defiance") - they knock off another of my squads who try and dash across the road and my attack is effectively being cut in two by this firelane. I eventually kill off in CC both the last remaining City Hall and Station defenders for the loss of a squad in return, and then whack the 8-1 when he fails to execute a successful ambush of a CX conscript.

Both the building objectives are captured but I have taken some big hits in return. Stephane is now well placed across the board to make it difficult for me to get anything across the road, and the clock is ticking. I do remember to pick up his abandoned LMG in the station and then start to challenge the "leedle tank" with it - this is the only thing that is stopping me crossing the railway line for the advance to the southern road net. This could be brilliant - I may just be able to shoot and kill the German armoured car with one of his own weapons!

I miss killing the "leedel tank" at 2 hex range the first time by one, aargh, so, as a random shot at start of Russian T4, I try again: roll a three - HIT! Snakes - kill, BURN! Awesome! Hoisted by his own petard and kind enough to leave me some nice friendly smoke to cover my dash across the railway too - think of the style points baby!! In the same turn, I break the only 467 (and 8-0) defending the wooden building line south of city hall from a big FG from the captured HMG - this nicely opens up the entire eastern half of the board.

Seeing this hole, I run a 7-0 and 447 past the broken guys so now I am adjacent to the 'road that must be crossed'. Crucially, the MMG strongpoint is also fired out, so spotting the opportunity, I am able to run at full pelt the 9-2 and 2 458s for 8 hexes over to the east side of the board to be in place for T5 and T6 assaults across the "road". I also run a commissar-led assault due south of the station through the woods to the southern rowhouses, next to the gully, where I force to rout two broken squads back across the southern road.

It's all or nothing time now for the Germans - Stephane revs up the Hanomag to come and put hurt on the redirected 9-2 stack and survives 4 cases of Street Fighting from my guys (where did my good rolls go???!) and sticks it right in the path of the Russians. I try to dash the 7-0 and 447 across the road, but go down to a three on a 1-2 attack - Stephane pulling out the die-rolls just when he needs them. Crucially my half-squad doesn't break on the K/1 result, but I am now really only placed on this extreme east side to get only 2.5 squads across the road....nightmare!! His HMG killstack then pulls off four 1MC results in a row to still be able to interdict almost all the streets in the region. Next, his last squad in the rowhouses manages to ambush me (6 for me, 1 for Stephane) and just withdraws next door to again interdict anything that dares try to cross the road, and then to compound it, one of the broken squads (with LMG) manages to pull out a three on a miracle self rally to put more hurt on my brave Ivans with added firelane potential - freakin' unbelievable. Finally, Stephane's sniper hots up for the only two shots of the game - the first sticks one between the eyes of the 10-0 commissar, the second breaks a 247 HS in the building next to the gully. This is horrible.

But lady luck, though sticking me in the ribs and kicking me in the nuts, did decide to smile on me for one last turn. In German T4, after two more failed Russian PAATC for Reaction Fire on the Hanomag (yuk) and a "missed by one" PAATC by the 9-2 leader (would you credit it?), the two 458s do find some grenades and I manage to whack the tiresome Hanomag at last. In one last desperate Defensive Fire shot, I again despair as the 8-1 leader with the MMG passes his third 1MC in a row - can you believe that - 5 passed 1MC on that stack in sequence? - but luckily the manning squad rolls a 10 and start to ask about "the location of Mommy". However, if the leader is able to rally these guys back in Turn 6, this is going to the edge...

Turn 6 starts - they miss the rally by one!!!! PHEW! This is the gap I need...I charge all my rowhouse units out across the street - they all go down in glory, but most importantly, they fix German covered MG arcs and use up all the German defensive fire options, who are all then fired out. Once that is gone, I am able to saunter the three squads from City Hall who used to own the now discarded German HMG past the broken MMG squad yelling, "yaah, Fritzski, look at us - we sneer in your general direction" and gain the win!

Awesome, heart stopping ASL at its best. This one has the hallmarks of a classic and must be tried - there was never one point where I ever felt totally comfortable about this - the Germans always have the chance to stop this one right to the end - even after clearing out both objective buildings by the end of Turn 3, there is still tons to do as the Russian and two more "roads" to cross (the railway and the southern road) - and the MMG is still critical to stopping you at this point. The biggest two events that changed this were the destrucion of the "leedle tank" to a 3 and 2 combination, and especially the loss of the 467 and 8-0 in the wooden buildings on the east side, which opened up the defence significantly.

Turn 1 is important but not completely critical to the result of the game - both sides can survive a bad Turn 1, but some thought needs to be given to the Russian setup with rout paths, stacking and placement of the commissars. It may be possible once onboard that the Russians could get a human wave going to get across the street, though there was never the opportunity or the need for me to do this. Things to read up and get comfortable with in this scenario are all the first, subsequent and final protective fire principles, Commissars and their effects, street-fighting and reaction fire, dash, and all the Fire Lane details as they are a major component of the battle. The Russian should also note the possibility the gully offers for some cheap and sneaky routes to win.

Great scenario - strongly recommended. Thanks Stephane for that one and especially for leaving the Armour-piercing incendiary bullets with your nice shiny LMG!!!

Nick (still trying to remember where we packed them thar' smoke grenades?)

Monday, October 02, 2006

AAR: KE20 - The Steel-Eyed Boys

Nick Drinkwater

German: Nick Drinkwater [SAN 3, ELR 2/4]

British: Tom Gillis [SAN 2, ELR 3]

September's game day was at Walter's house - this lies in some long lost forgotten corner of the greater Houston area , somewhere lost in the wilds, wait for it ... OUTSIDE THE BELTWAY! I mean, man, for us ITL types, that's like, Canada, right? I'd prepared for this expedition into the unknown by retaining a spare cup of coffee for any emergency that cropped up - this was done through the cunning plan of throwing it all over my lap at breakfast - when times got really tough, I could always pour milk on myself and suck out the sweet caffeinated nectar and imagine I was having a Montrosian-latte. (Note that even this desperate measure would be better than anything you get served in Austin...!).

Anyways, having noticed that the map for this area was almost empty apart from the words "Here be dragons", I employed a local guide (Tom) to hack through the undergrowth and guide me to Walter's, where to my pleasant surprise, Ken, a fellow ITL-ite, had also managed to make it through the wall of death, bamboo spears and headhunting cannibals. Even more impressive was he'd found this oasis single- handed - no stinkin' guide for him! Brave fellow indeed! Two ITL-ites in the same wilderness room at the same time on the same game day? The world really was upside down today.

Before the game, Tom and myself had decided we want to play something meaty - however, Tom's been playing like, forever, so we also wanted to try and find something he hadn't played before which was harder. Luckily, I do have some of the Kinetic Energy scenario packs which I'd bought years ago and there was some 'new' stuff in here which looked tasty. The problem many people have with the KE stuff is that they automatically assume the VC are going to be very confusing or that there are pages of impenetrable SSRs to wade through ... I don't think is really all that true - granted, there are some challenging ones in there (the mobile German "democharges on tracks" rules is one example that comes to mind), but there's also a lot of good straight- forward stuff in here as well, usually with interesting twists (I'm keen to try the four-phase "Dreadnought of Razne-thingy" scenario some time) and of course the ultimate three-player challenge, "The Dogs of War", is a KE special. If you are looking for something new and you have a good few hours, then I would recommend these scenarios strongly.

In the late nineties, KE had done one scenario pack that was of real interest to me - this was the march of the British 53rd and 11th Armoured Divisions across northern Germany in April 1945, taking on the reserve and replacement battalion of the 12th SS HJ division and a recently constituted Marine division - these scenarios are largely based on an excellent book called "No Triumphant Procession" that is filled with very descriptive small unit actions. I had actually bought this book last month on Amazon and had just finished reading it and so was itching to play something from it, though I don't actually own the original "At the Sharp End" scenario pack. I do however, own a series of sumptuous colour updated scenarios that KE issued to amend a few perceived balance issues with some of their earlier packs - 3 modified scenarios from the original British pack are included (Black Friday, Franzen's Roadblock and The Steel Eyed Boys) and all look quite fun. We opted for The Steel Eyed Boys, and I was happy to play the bitter and desperate SS, whilst Tom took on the challenge of a very tasty late war British company from the Rifle Brigade with plentiful armour support from the 11th AD.

The action is set on a slightly odd board configuration of Boards 11 and 18 with their level 1 hills flanking the trusty stone village of Board 10, rowhouses and all. Environmental conditions are moist, but a stiff breeze is blowing smoke from two burning British tanks right across the frontal southernmost buildings of Board 10 at start. What at first seems odd is that the Board 10 village is right at the 'front' of the German defence line and the Brits can simply walk on in Turn 1 and start fighting immediately for the buildings. The Germans set up between hexrows EE-U, right in the centre of the village whilst there is the whole empty half of the board 'behind' the main scene of the action - odd huh? However, this configuration is explained by the somewhat advanced nature of the VC - the Germans can win by having 15 VP on board 10 and/or exited offboard from the north, back edge of the playing area, but to do that they are going to need to beat a desperate retreat across the open half of board 10 under the guns and noses of the well armed and armoured Brits sat on the heights - a veritable reverse Valley of Death!

The Germans can also win by retaining control of eleven board 10 building / rubble hexes at game end (all board 10 buildings start under German control at start, even those outside the original setup area) at game end after 7 turns, or finally, by achieving an instant win by inflicting 20 CVP on the Brits. The Germans are very tasty but apparently brittle - 12 x 658s, 4 x 348s, 1 x HMG, 2 x MMG, 4 x LMG, 4 x Psk, 2 x DC and up to 28 Panzerfausts. Pretty damn good, especially as we will be mainly conducting a stone building defence. The big problem they have is very weak leadership (3 x 8-0, and a 7- 0, all ELR 4) and that there is a strong possibility of their main squad contingent reducing down to a 447 (SS) very quickly with a ELR of 2. Hmmm. Less good - I expect to see numerous 447s by scenario end. Finally I receive 12 x ? in addition to those received due to British offboard setup, so I need to set some good dummy stacks - this combines nicely with a 2 HIP squad equivalent potential to create a few tricks for unwary British tanks and three boresighted locations for the machine-guns.

The Brits, despite their late war "lets avoid undue casualties" ELR of 3, are awesome: 18 no-cowering 457s, 4 x 247s, 2 x Lt Mtr, 6 x LMG, 2 x MMG, 4 x Piats, 6 (six!) Comets and 4 M5 halftracks. In this environment, with no long-range enemy AT assets or armour to worry about, the Comet is a brilliant tank with both SD and SM (3-hex range), 6FP of MGs and a 12 FP equivalent 77L gun for knocking dug-in tough guys out of stone buildings. They also have outstanding leadership (9-2 plus a load of 8-1s and 8-0s) - a really nice mobile, late war assault group. They also have the boards and armoured mobility to surround the village in very short order whilst the bulk of their infantry are swiftly assaulting the village the hard way from the front. Knowing that Tom plays hard and aggressive on the attack, I quickly reject any notion of being able to slip off a bunch of infantry through the open area to the north of the village to get some easy escape VP - he's far too good to let that happen - so I set up for an all-round contracting defence of the village with the intention of trying to hold eleven building hexes or get him on the low CVP cap (another mechanic to reflect the quoted wish to avoid excess casualties on the behalf of the British), finalising on the big Board 10 factory where all my troops will be fanatic by SSR. Recognising but yet rejecting the 'escape clause' made the setup a little easier as I was able to be more focussed - all the HIP and boresighting traps were put in place to whack incautious Brit infantry or tanks in the environs of the village - a HIP PSk HS in woods on both the east and west side in middle ground locations and a 658 MMG combo in the backfield to try and put the hammer on slack Brit squads creeping around to seal off the rear.

As expected, Tom moved two split armour forces with HTs to the northwest and east of the village to seal off any immediate thoughts of running offboard. He also moved in strongly with a big ground assault directly into the teeth of the defence on the southwest and southern sides of the village, supported by a couple of Comets, trying but failing to find SM shells. I had set up tough with the big HMG stack in the factory and then squads and dummies scattered evenly around the rest of the village. Through armoured assault Tom marched hard onto my outlying defences and I missed three PF shots and 2 PSk shots in a row - eventually I managed to find a 'Shrek shell and reduced a Comet to atoms and started the VP assault (two for the crew only, vehicles not counting against the balance). Tom also tried to jump an isolated half-squad in hexrow EE in CC - these guys were total heroes and managed to whack two squad equivalents over three turns before going down on the fourth attempt. Despite missing another ambush with a concealed squad against a CX half-squad, I eventually managed to get them too - Tom's VP cap was rising sharply by Turn 2. I was however, taking some sharp knocks in return - an outlying squad was encircled and then wiped for FTR (no quarter in effect by SSR), and other squads and half-squads were being reduced or eliminated slowly, especially in the SE corner of the village.

Seeing the need to get more cheap victory points by killing tanks with Faust fire, I ran another two squads out into the woods line on the southwest side of the village, but these guys got hosed by a +6 shot from an adjacent Comet despite smoke, woods TEM, buttoned up and a CA change. Eeek. I did manage to smoke another Comet from a long- distance Shrek shot (two more VP), and knocked off some riders for some more VP. One of the HIP half-squad traps whacked a British half- squad adjacent in the open, but I also had a MMG fail for a heart- stopping turn before recovering. Turn 3 was absolutely horrible - in another missed by 'one' shot sequence, I rolled a series of 9, 11, 10, 11, 8 and 9 for a series of To Hits and IFT rolls - my "usual roll horribly in one long sequence" event for any scenario I play. At this point, the defence was collapsing badly and although the British CVP cap was at 12, things were breaking horribly everywhere. A Psk X'ed on an 11, a half-squad rallied themselves to death on a 12, and one of my leaders did the same - to counteract this Tom X'ed one of his two FT (oh yes, the Brits also had two FTs!) on his first shot. Then he berserked one of my whole squads who subsequently went down in a hail of flame and gun fire. Despite this, Tom was still having trouble getting all his units co-ordinated and focussed at any one point or place at any one time, reflected by an inability to rally a 8-0, 2 x 457 stack for three turns. In contrast, I managed to battle harden my 8-0 with the HMG to an 8-1 - a vital turn of affairs as it turned out.

By Turn 4, things were getting desperate for me - my counter attack in the woods had failed, my HMG squad had broken and with two other squads, were forced to rout to the back of the factory with the 8-1. Only my very backline was holding tough with a 658/LMG and a 658/MMG FG holding back the British mobile force at the very back of the village. I had to rally the Factory HMG force and this is where the Fanatic bonus allied to the additional -1 leadership from the battle hardened leader just did the trick - I managed to just rally the lot of them, and then moved back to the front of the factory and reclaim the temporarily lost HMG. We then ended up in a Mexican standoff with Tom's 9-2 and 2 x 457 stack which were now like a rabbit in the headlights: in the open amongst the swirling smoke - who would blink first? Tom crucially rolled an 11 on the Brit Prep Fire in T5 and my big stack came through unscathed. I then whacked him hard in the open with a -1 directed HMG - I managed to firstly pin the 9-2 in return and then break one of the squads, but most importantly, kept rate. Further fire CR'ed the broken squad, broke the unbroken 457 and managed to break the 9-2! Yaay! To add to my fortune, Tom was unable to rally the 9-2 in German Turn 5, and I kept the pressure on with more ROF which CR'ed the half-squad. Bigger Yaay and another VP. This fire only wounded the broken 9-2 however, and the last broken squad pulled out consecutive snakes on two 1 MC - the first resulted in disruption, but they weren't adjacent and no quarter was in effect anyway, so this was like a null result for me. The second snakes was for me even more heart-breaking - battle hardening and hero creation was a result and these guys were now pretty much unscathed. I was 1 point away from victory but out of bullets in this part of the village and feeling gutted.

Luckily though my backline was still there, fighting hard, rough and tough. I knew that if I failed to scratch any of the British infantry now, I was probably going to lose as I had already missed with a long range Pf on one of his tanks and I had also had one further shot at another broken squad in woods, but these guys had also passed a game winning MC with yet another of the many 4s that Tom rolled on his special dice. Tom had both my backline key squads double-acquired by three Comets and it was only going to be a round or two before I went down in a hail of tank shells. I had one final 16 FP shot left at an unbroken squad in a stone building - amazingly, these guys broke, and best of all, both MGs kept rate! Woohoo! The follow up shot was crucial - again a 4 on the IFT for me and a 1MC for Tom. Heart in mouth time. Pass this and there is nothing left to shoot and he's going to be carving me to small, feldgrau coloured pieces...

Tom rolls a 10. The squad casualty reduces. 1 VP for me. The magic 20 CVP cap is reached. Game over. German win.

Awesome game with a great opponent - the guys in Texas are such fun to play and Tom's a star! We had the usual ASL madness (a berserker, three cases of battle hardening, two fate die-rolls for the Germans, my sniper landing directly on Tom's sniper to remove it from the game, five malfunctions (three for Tom, including the FT and two Comet MA (one repaired)) and much end-game nail-biting desperation where every roll counted. In post-game discussion, we both thought Tom had probably pushed a bit too hard too early - the loss of the two Comets was four good VP for me - he also was very unlucky with the half-squad from hell CC which also took another four VP. His inability to rally the 8-0 stack was important as their extra firepower would have been helpful too. Finally, despite my usual mid- game dicing of myself, I did receive some top ROF die-rolls at the very end to just send Tom over the CVP limit - if I hadn't done that, he would certainly have won the game on the other VC as I was fast running out of troops to hold buildings and the British still had troops in abundance - I had under 50% of my force left at game end and I was seriously acquired by the tanks - the last round really was a round of all or nothing and luckily it just paid off.

Great scenario, much fun, needs some careful playing with both forces and demands some tough decision making for both sides, which is always the sign of a good ASL scenario. Recommended.

If you have comments, as always, would like to hear back!

Nick